This was such a fun project! Here is a step by step guide on how we updated our fireplace. 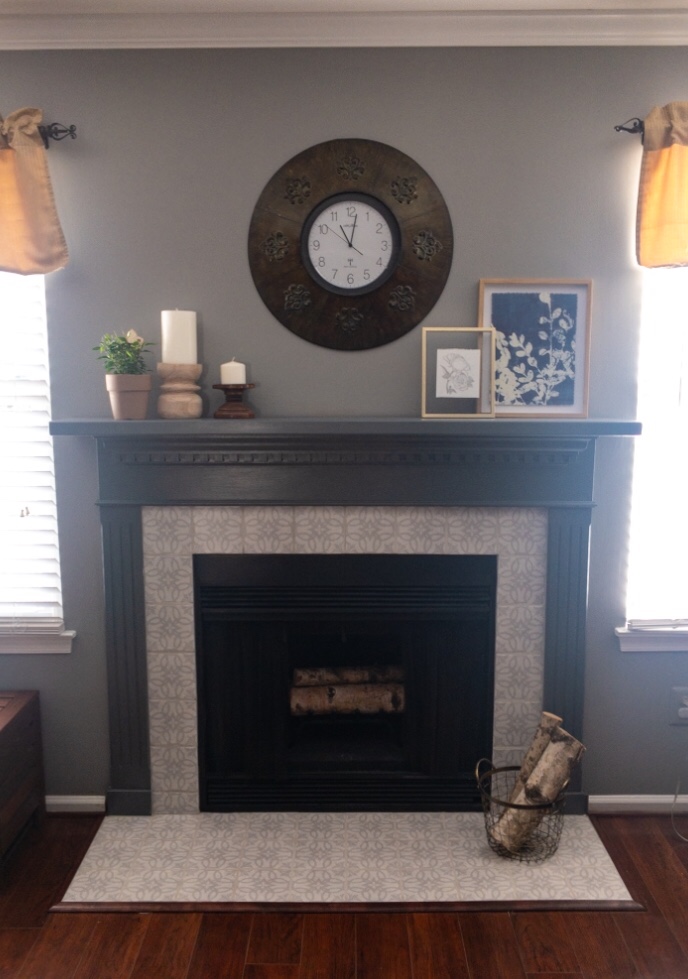
1. First, get a vision on how you would like to makeover your fireplace. I used Pinterest for inspiration and also asked a few friends.
2. Measure area on which you will need new tile/stone. Unless you plan on painting existing tile/stone.
3. Pick out new tile/stone. We picked out tile that was the exact same size as the tile that was already there. It was sold in box of 50. There was a plus and minus to this. The cost was $49, meaning $1 per tile which is pretty good. Downside, we needed exactly 50 tiles, which meant no room for mistakes. Choose a grout color a shade lighter than the tile you choose or one that is not prominent in color. You want the tile to be the eye catcher, not the grout.
4. Gather together all other products you will need for this project. Make sure to ask any family/friends if they have tools you can borrow if you don’t own already or see if you can rent at your local hardware store too.
Here is a list of what we used: tiles, paint/stain, primer, high heat spray paint( if painting insert), thinset, grout, spacers, nails, wood for ledge, wood for base trim, drywall(if necessary), caulk, water, sponge.
Tools needed: hammer/chisel or electric chisel, caulk gun, paint brush, trowel, and grout float.
5. Tear up old tile. This was the fun part for me! You may need to remove the wood trim around floor base to start. I then used an electric chisel for the first time similar to this one https://www.amazon.com/XtremepowerUS-Electric-Demolition-Concrete-2200Watt/dp/B074PFSGFX. First timer mistake: you do not need to be so hard on the tile with this tool. I ended up tearing up a chunk or two of drywall. 😬You can also use a hammer and chisel. YouTube has plenty of tutorials on this. We ended up keeping the tiles on floor down and tiled over these ones later. 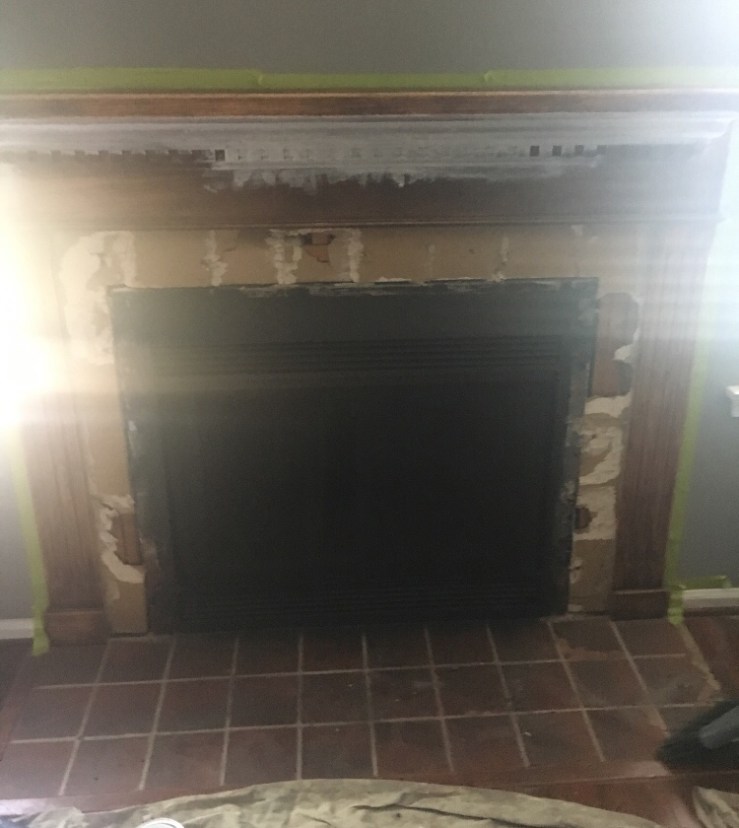
6. Sand mantel/wood surround. If painting, apply Stix primer. https://www.walmart.com/ip/BENJAMIN-MOORE-CO-INSL-X-SXA110099-04-Quart-White-Stix-Water-Primer/38470665
7. Fix any drywall if need be. We actually ended up just replacing all of it. Just measure, fit, and nail in. 
8. If you decide to put in a new insert this would be time to do that. Ours is in good condition. I actually had spray painted black to give it a cleaner look using https://www.homedepot.com/p/Rust-Oleum-Specialty-12-oz-High-Heat-Satin-Bar-B-Que-Black-Spray-Paint-3-Pack-7778830/303282792
9. Put up a temporary ledge to prevent tiles from sliding. Here is a look at what we used. (See step 14 for picture of ledge)
10. Mix up thinset according to directions listed on your bag of mortar. We used one similar to this one from Lowe’s.
https://www.lowes.com/pd/MAPEI-Ceramic-50-lb-Gray-Powder-Thinset-Mortar/3743807
11. Apply thinset to surround one area at a time. Also, apply thin layer to back of tile and comb out with notched edge of trowel to allow tiles to stick better similar to this one https://www.lowes.com/pd/QLT-by-Marshalltown-9-in-Flooring-Trowel/1000204237. Lay tile on surround. We started with the bottom. They were a little bit easier since we were going over the existing tiles here. I recommend laying out your tiles on the floor first with measurements of the surround, so you have an idea of where to place them ahead of time.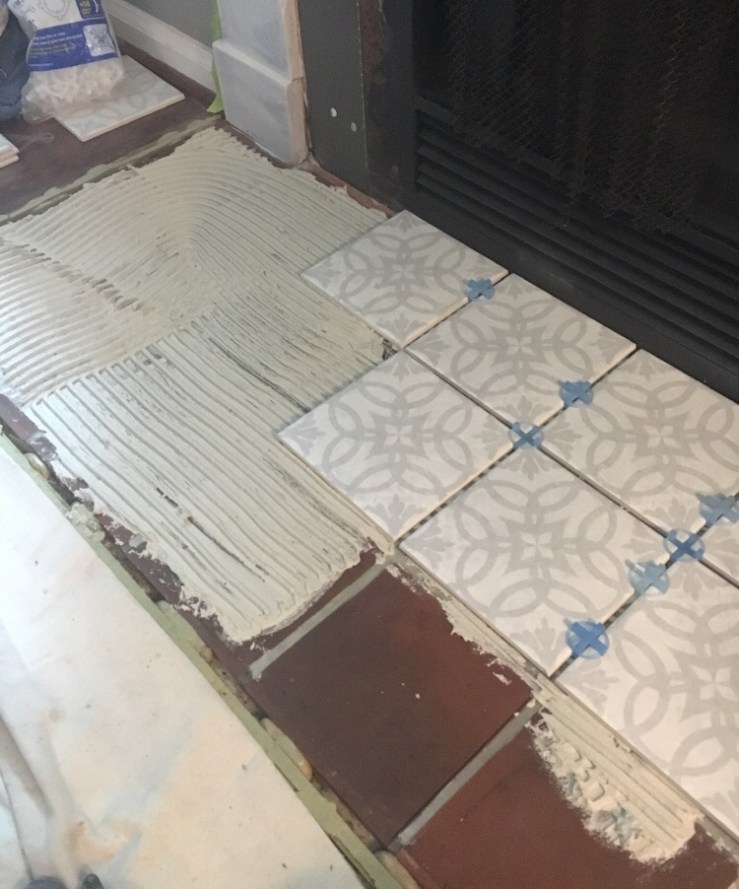
12. Place spacers in between tiles as you go through one by one. Again, I recommend laying out so you have an idea of what size spacers you plan to use. The size of spacers all depends on how big or small you would like that grout line. We used 1/8 spacers similar to these https://www.lowes.com/pd/TAVY-100-Pack-1-in-W-x-1-in-L-1-8-in-White-Plastic-Tile-Spacer/1198399.
13. You may need to cut tile at base of surround. Make sure to measure correctly and use a tile cutter for a clean cut. 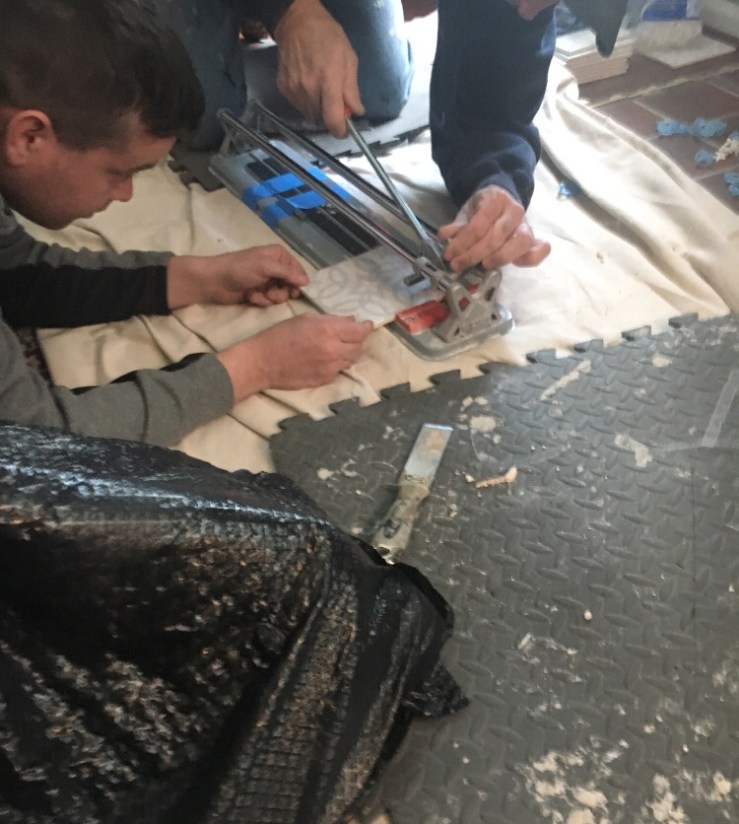
14. Do steps 8-10 for top as well. Let tiles sit for 24 hours before applying grout.
15. Remove temporary ledge.
16. Mix up grout according to packaging. Grout drys up quickly, so you will need to move at fast pace once it is mixed and ready to go!
17. I started with the top of tiles and worked my way down. Apply grout in between tiles and smooth out with grout float. Move the grout float diagonally so the grout sits evenly in between the tiles. Do not worry about thin layer of grout residue on tile, it will wash off later.
18. After grout is all down, wait 30 minutes then sponge off residue with water. Wait another 30-60 minutes and repeat with sponge.
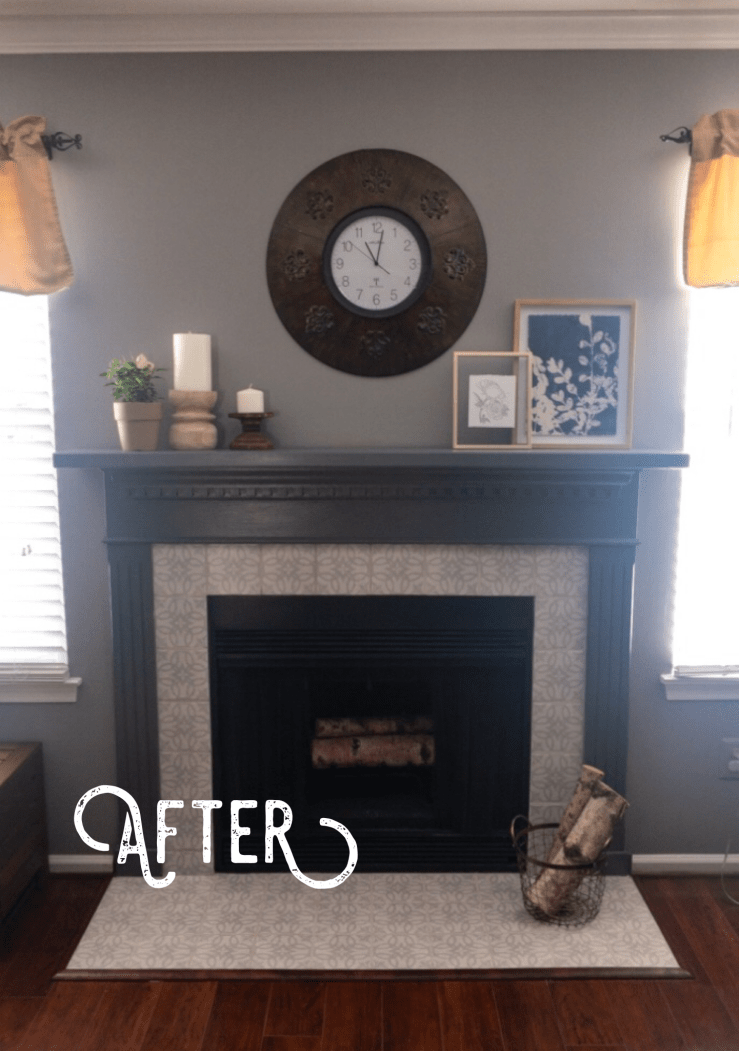
19. Paint or stain wood surround and mantel. 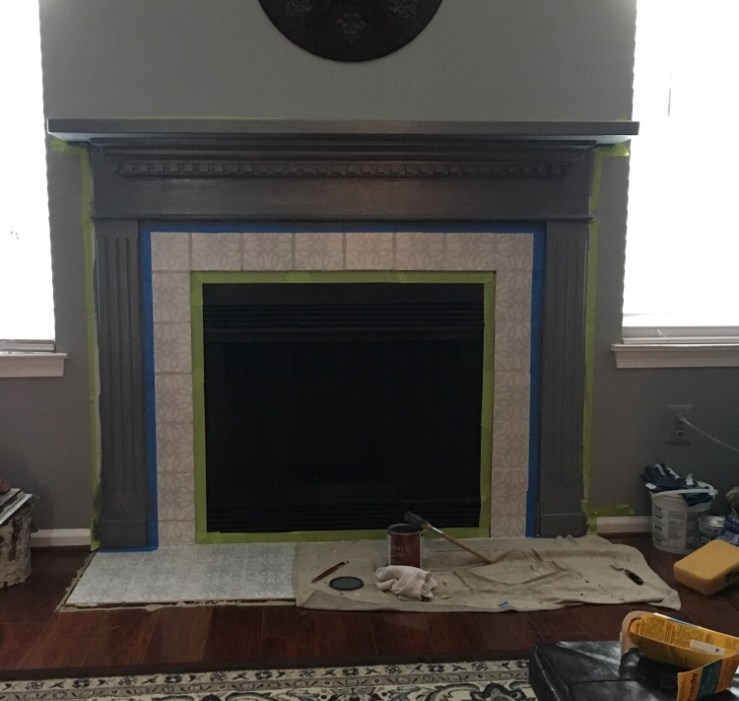
20. Place wood border around base of fireplace. If existing is still in good condition you can reuse. We ended up cutting and staining new wood trim to match our floors.
21. Caulk in necessary places. They sell caulk that matches color of grout you choose.
22. Finished! Decorate mantel and sit and enjoy a cozy warm fire in your new fireplace!

Thank you for visiting my page!